
Rudder Update
4 cutting tools and some toothpicks.

Toothpicks is a little dramatic
After removing the skin of the rudder, Jeremy was faced with a blank slate of mahogany. A warped blank slate of 3 different pieces of mahogany, held together in a way he could not yet discern. Out came the oscillating tool (1), the jigsaw (2), and even the circular saw (3) to cut slits into the rudder. He then used a chop saw (4) to cut wedges of teak (those toothpicks).
Basically, when he cut the slits and applied some pressure on the side where the warp bent towards, he could move the rudder into alignment. The wedges, inserted into that same, kept the wood from springing back.
Where geometry meets woodworking, a vocabulary lesson.
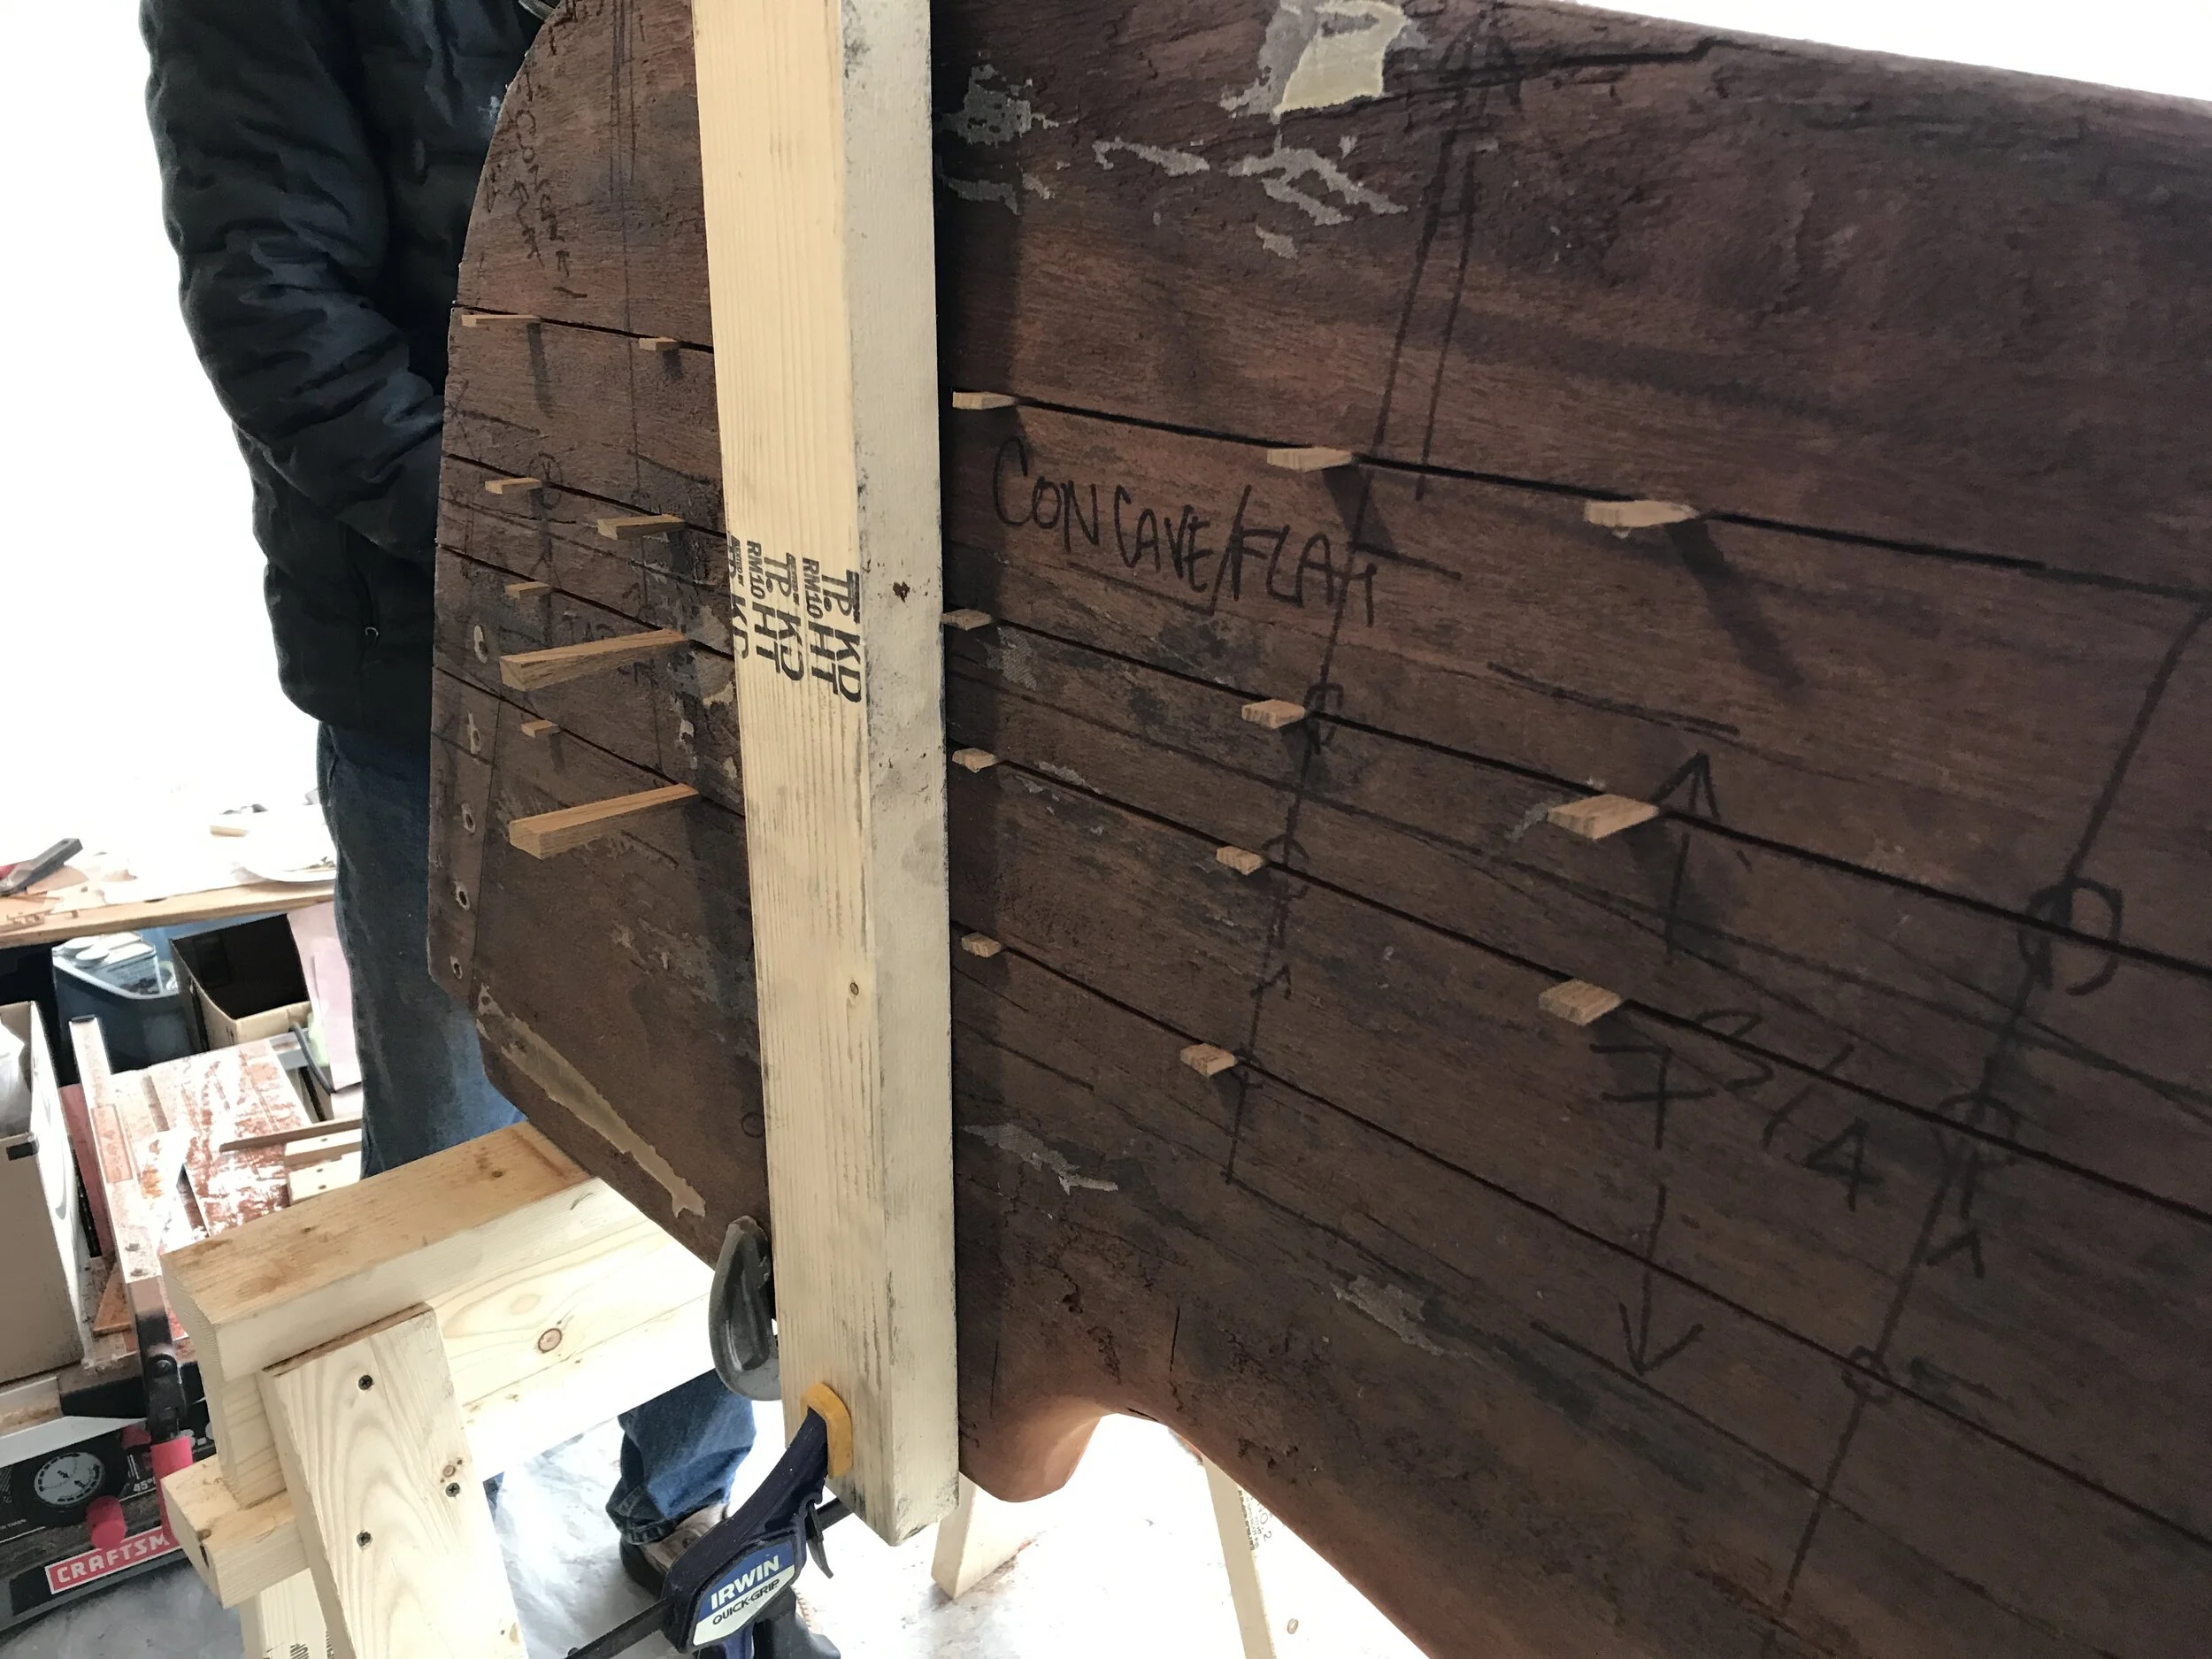
Concave. Really? I thought I left geometry behind me . . .
Between relearning what convex (curved) and concave (cupped) are, hearing the term “kerf” (fancy word for slit) for the first time, and learning that a “drift” is a good thing, watching Jeremy deal with the rudder was an exercise in getting a little more conversant in the specific terminology present in the life of woodworking. I don’t claim that I’ll remember much of it, but for now I can pretend to be knowledgeable when asked. In essence, to fix the rudder was to try to remove the concave tendencies from the wood. He could have tried to sand down the bulge, but the warp was too steep on a structure too important to make this a practical or good idea. The initial hope was that perhaps by kerfing, any pressure would be released and the wood would naturally move to straight. No such luck.
He cut deeper kerfs and widened them a bit; in the process, he found that there are indeed drifts holding the mahogany planks together. These are essentially tie-rods, if that’s not too blunt; on this rudder, there are 3 on each edge, running horizontally into about 2/3 the distance across the rudder. It’s good that they’re there, as they provide structure and support for the basic shape.
When fixing takes more time than building new.

Sanding down the epoxy-filled kerfs
I reached out to my friend Anne Bryant, a wooden boat lover whose partner, Andrew Guest, is restoring a Cornish lugger called Rosalind for some advice. Her eyes lit up and my IG messages were filled with excited video messages. “Andrew just built a new rudder for Rosalind! It was super easy and fast!” We scheduled a call to talk details, and for a day or so it really looked like that might be the way to go.
Layers of marine plywood held together with thickened epoxy, sheathed in fiberglass. The rudder itself would serve as the template; no need to design something that would work. It would indeed be quick and easy to build. The cautionary tales against such construction did not seem to apply in our case, where we’re dealing with a transom-hung rudder with solid support all along the leading edge. We could mitigate the worries by running the plywood diagonally.
The bigger woe, honestly, would have been losing the original rudder. Thick, beautiful, sound mahogany planks with a whimsical curlicue at the top end. Jeremy continued to cut and refine his approach; by the time our call happened with Anne and Andrew, he was pretty determined to save this original piece of the boat. Having their more experienced enthusiastic approval, plus that of a fellow BCC owner who is a craftsman in his own right, helped make it feel like this was a good choice.
At this point, on Thursday afternoon, he’s been working non-stop on the rudder, 9 hours a day or more, for over a week. Eight days. He’s hoping to start fiberglassing today, which will mean there might be another 3 days of work to go. It definitely would have been faster to build a new rudder.
But then he wouldn’t have saved this one.